

Table of Contents
Introduction:
Are you itching to work on that do-it-yourself project but are intimidated by the aisles of hardware stores? You’re not by yourself! For novices, the world of (hardware and tools) might be scary. Don’t worry, though; this guide is your one-stop shop for making the best shopping list possible for hardware and equipment. We’ll go over the necessities to tackle typical projects, how to choose a screw and nail organizer, and even how to deal with that annoying toolbox latch problem. Prepare to go from a novice at do-it-yourself projects to a hardware hero!

1. Conquer Your First Project: The Essential Hardware and Tools for Beginners:
The dripping tap is calling your name, and that bookshelf is asking to be constructed. To ensure a seamless (and profitable) experience, get the appropriate hardware and tools before starting your first do-it-yourself project. Fear not—all you need to get started is a partially stocked workshop! This fundamental toolset will help you with a lot of everyday tasks around the house:
Must-Haves:
Instruments of Measurement: Your best friend will be a tape measure; it will help you with many jobs like marking lumber cuts properly and measuring wall space for picture hanging.
Instruments for Cutting: For light cutting tasks and boxes, a robust utility knife works well; for wood planks or PVC pipes, a handsaw works well.
Fastening Instruments: When you use a quality hammer to drive nails for hanging shelves or constructing furniture, it will become an extension of your arm. Remember to carry both a flathead and a Phillips head screwdriver for tightening fasteners.
Safety Gear: Wear safety glasses when drilling or hammering to protect your eyes.
Bonus Items:
Level: A torpedo level makes it simple to hang pictures straight or make sure a bookcase is level.
Drill and Drill Bits: A cordless drill with a selection of drill bits opens up a world of options, from hanging curtains to constructing furniture, albeit it’s not necessary for every activity.
Screw & Nail Organizer: A divided organizer can prevent your hardware store from turning into a disorganized mess. This can help you avoid aggravation and save time when looking for the correct screw for your project.
2. Don't Get Screwed! Choosing the Right Hardware and Tools for Every Job:
There is an enormous assortment of tools and hardware in the aisles of hardware stores. While it may be tempting to take hold of the first item you see, making the correct selections can be the difference between a job that turns out well and one that is a tiresome mess. The following advice will help you make sense of the hardware store and pick the right tools for the job:
Understand Your Project: Decide exactly what you want to achieve before you go to the store. Are you doing a plumbing repair, putting together some furniture, or hanging a picture frame? Your choice of hardware and tools will be guided by your understanding of the work at hand.
Find the Right Tool for the Job: Every hammer is not made equally! For hanging pictures, a lightweight claw hammer works well; for driving huge nails into thick timber, a larger framing hammer is more appropriate. Similarly, a Phillips head screwdriver cannot be used to remove a flathead screw.
Quality Matters: Budgeting is important, but in the long term, investing in high-quality equipment will save you money and frustration. Inexpensive tools may not work effectively and break easily. Select well-known brands with a solid reputation for dependability and think about buying a few multi-use tools, such as a multi-bit screwdriver or an adjustable (wrench).
Don’t Forget the Hardware: It’s important to use the proper screw or nail for the job. Make sure the screws you select are appropriate for the material you’re dealing with (wood, drywall, etc.) as they come in a variety of lengths, thicknesses, and materials. Similar to how nails vary in size and shape, use finishing nails for delicate work and stronger nails for larger projects.
Keep it Organized: A tidy toolbox can save your life. To keep your hardware supply well-organized, get a divided screw and nail organizer. In addition to saving you time when looking for the perfect element for a project, this also helps you avoid frustration and even confusion.

3. From Toolbox Chaos to Organized Bliss: Screw & Nail Organizer Solutions:
No one likes to tackle do-it-yourself projects when their toolkit is disorganized. It is a waste of time and a needless source of aggravation to search through a disorganized tangle of nails, screws, and other hardware. Necessity not be a source of fear, my fellow handymen! Your toolbox doesn’t have to be a chaotic mess—these screw and nail organizer ideas can turn it into an efficient haven:
Compartmentalized Trays: Spend money on a multi-compartment toolbox organizer. This enables you to sort your screws and nails according to length, kind (such as wood, finishing, or drywall screws), and other factors. It’s much easier to discover the appropriate hardware when everything is organized nicely.
Create Your Own Dividers: Having a DIY moment? Using thin plywood or robust cardboard, make your own toolbox dividers. Make sure each section is labeled for convenient identification after cutting them to fit your toolbox. You can tailor the organization to your own requirements with this cost-effective solution.
Wall-Mounted Organizers: Limited toolbox space? In your workshop or craft space, think about installing wall-mounted organizers. They frequently feature transparent containers that let you quickly see your hardware, making it simple to select what you need without digging through your toolbox. They also provide your toolbox with more room for larger tools, which is quite useful.
Magnetic Strips: Too little room in the drawers? Use the magnetic strips inside your toolbox lid to retain nails and screws. Finishing nails or various-sized drywall screws are examples of hardware that might benefit greatly from this kind of solution. To ensure that this strategy works, just make sure the screws and nails you select have a magnetic head.
Label Everything: Whatever approach you use for organization, labeling is essential! To distinguish between each container, use label makers or clear labels. You’ll not only avoid confusion and possible mix-ups during your project, but you’ll also save time looking.
4. Toolbox TLC: Easy Fixes for Common Hardware and Tool Problems:
Over time, even the most dependable instruments may encounter small problems. Hold off on replacing your reliable hammer just yet! Here are a few quick repairs to keep your toolbox working like new for typical hardware and tool issues:
Sticky Screwdrivers: Using a loose or sticky screwdriver can be a tedious task when trying to tighten screws. Cleaning the shaft with rubbing alcohol and a cloth is an easy solution. This gets rid of any trash or dirt that could be generating friction.
Dull Saw Blades: A dull saw blade can cause material damage and make cutting difficult. Invest in a sharpening kit or have a professional sharpen your blades. In addition to ensuring clean cuts, a sharp blade increases sawing safety and efficiency.
Loose Hammer Head: Your hammer head’s recognizable wobble may pose a risk to your safety. Be at ease—there’s usually a quick fix! Apply pressure to the wedge that fastens the head to the handle with a mallet and a wooden block. Avoid overtightening as this may lead to handle damage.
Broken Tool Box Latch: A malfunctioning toolbox latch can cause a lot of trouble. Depending on how the latch is made, you might be able to fix the damaged part on your own. If the latch is fully broken, though, you might want to replace it or take your toolbox to a repair shop.
Rusty Tools: Rust has the ability to destroy your tools. A wire brush and some WD-40 will do wonders for little rust areas. Consider applying a rust removal product as directed by the manufacturer for more severe rust. After the rust has been eliminated, lightly cover the area with oil to stop rust from forming again.
5. Hardware Hero: Learn the Lingo of Tools and Hardware:
Amid the new jargon and devices, are you feeling disoriented in the hardware store aisles? Aspired do-it-yourselfer? Fear not! Your journey from a confused novice to a hardware hero can be accelerated by arming yourself with fundamental tools and hardware knowledge. Now let’s define a few terms:
Tools:
Hammer: This reliable instrument is available in a range of styles and weights. The purpose of a framing hammer is to drive huge nails into lumber, whereas a claw hammer is designed with a curved claw for nail extraction.
Screwdriver: (Screwdrivers) tighten and loosen screws; they come in flathead and Phillips head variants.
Saw: There is a saw for every purpose; a jigsaw can perform more complex cutting tasks, while a handsaw can handle wood planks and light materials.
Drill & Drill Bits: You may drill holes in a variety of materials using a power drill. Concrete, metal, and wood are among the materials for which drill bits are made, and they are available in a variety of diameters.
Level: Guarantees that furniture rests evenly and shelves hang straight. For the majority of home tasks, a torpedo level is a simple solution.
Hardware:
Screws: Various materials, thicknesses, and lengths are available for these. While wood screws are more appropriate for making furniture, drywall screws are perfect for hanging drywall.
Nails: Like screws, nails are available in a variety of diameters and head designs. Sturdier finishing nails are used for heavy operations; small-headed finishing nails are ideal for trim work.
Washers: Round, flat bits that are positioned beneath the head of a screw or nut to disperse pressure and shield the material.
Nuts & Bolts: Fasteners known as nuts and bolts are threaded devices that tighten a tight connection by screwing onto one other.
Sandpaper: For sanding down uneven surfaces before staining or painting. Different grades of grits are available; finer grits produce a smoother surface.

6. Quality vs. Savings: Choosing Hardware and Tools that Last:
There’s no denying the appeal of a good deal, particularly when it comes to filling your (toolbox). But the old saying “you get what you pay for” frequently applies to hardware and tools. Purchasing long-lasting tools and conserving money can coexist in harmony if you follow these tips:
Think About the Project: Are you starting a DIY journey or taking on a one-time project? If this is a one-time task, an inexpensive tool might work just fine. On the other hand, if you use the tool frequently, buying a high-quality tool will end up saving you money. A good hammer might survive for years, whereas a cheap one might fail after a few uses and need to be replaced.
Put Functionality First: Avoid getting sucked into expensive features you won’t utilize. Select instruments with a straightforward, useful design that completes the task quickly. A plain hammer with a strong handle will work better than an ostentatious hammer with extra bells and whistles.
Seek Reliable Brands: Reputable brands are recognized for their dedication to longevity and excellence. These tools are less likely to fail or malfunction, which will save you frustration and replacement money in the future, even though their price may be a little greater.
Think Multipurpose: Make an investment in adaptable tools that can handle a variety of jobs. An excellent adjustable wrench can eliminate the need for an entire set of wrenches, while a multi-bit screwdriver combines multiple head possibilities into a single, portable device. This clears out unnecessary items from your toolbox and saves money as well.
Don’t Undervalue Good Hardware: Choosing high-quality hardware guarantees the longevity of a project, just like tools do. Sturdy nails hold fast over time, and strong screws resist stripping. Keep in mind that a project is only as good as its weakest component!
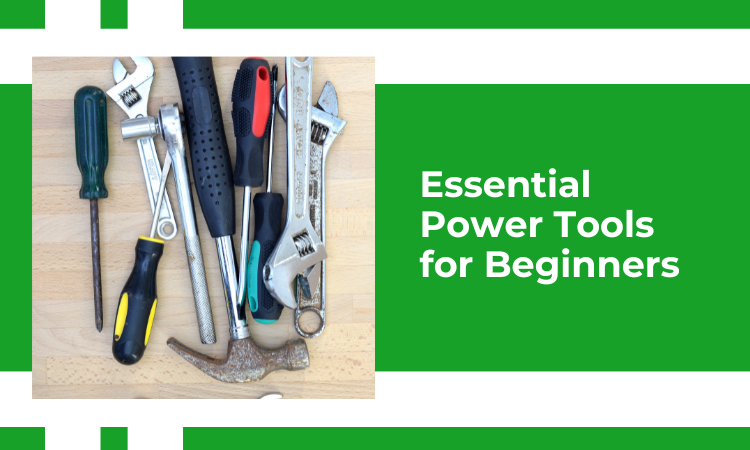
7. Beyond the Hammer: Essential Power Tools for Beginners:
There is more to DIY than just a hammer and screwdriver. You can take on more difficult tasks faster and more effectively using power tools, which can open up a whole new world of possibilities for your projects. However, the power tool aisle might be intimidating to novices. The following vital power tools are worth adding to your growing collection of do-it-yourself projects:
Cordless Drill/Driver: An indispensable tool is the cordless drill/driver. Drilling pilot holes for screws, adjusting screw torque, and even stirring paint with a mixing attachment are all possible with it. To enhance ease of use and mobility, go for a cordless model.
Jigsaw: Suitable for cutting countertops and producing decorative trim, this handheld saw can cut complex curves and shapes in wood.
Circular Saw: A circular saw can make straight cuts in plywood or wood planks that are quite useful. For making shelves or cutting lumber for furniture projects, it’s perfect.
Power Sander: Using a power sander to smooth uneven surfaces before painting or staining is quite easy. When opposed to manual sanding, it saves you both time and energy.

8. Safety First! Essential Gear to Keep You Safe During DIY Projects:
DIY projects are a great way to add your own touch and make cost savings in your house. Prioritizing safety is crucial, though, before you let your inner handyman or woman go. The following necessary equipment will keep you safe as you work on those home renovation projects:
Eye protection: It is imperative that you wear safety glasses. Serious eye injuries might result from flying sawdust or pounding debris during drilling. Invest in snug-fitting, impact-resistant safety glasses that are comfortable to wear.
Hand Protection: varied gloves provide varied levels of protection based on the project. For handling sharp objects or rough lumber, work gloves with a solid grip are recommended. When handling metal or glass, wear gloves that can withstand cuts.
Hearing Protection: Wearing hearing protection is important since prolonged exposure to power tool noises can cause hearing impairment. Protect your valuable hearing by effectively blocking out noise with earmuffs or earplugs.
Respiratory Protection: When using chemicals, drywall, or sanding, dust masks are helpful. Choose a mask whose amount of filtration is appropriate for the particular work at hand.
Robust Footwear: To protect your feet from cuts caused by falls, slips, and dropped tools, you must wear closed-toe shoes with adequate traction. While working on DIY projects, stay away from wearing sandals or loose-fitting shoes.
Knee pads: These are useful for protecting your knees when bending over on hard surfaces, such as when installing flooring or laying tile.
First Aid Kit: Prepare for minor injuries such as cuts, scratches, and splinters by keeping a fully filled (first aid kit) close at hand in your work area.

9. Building Your Dream Workshop: Essential Hardware and Tool Storage Solutions:
Every do-it-yourselfer dreams of a well-organized workshop that is a great place to be creative and get things done. But toolboxes that are too full and gear that is all over the place can quickly turn that dream into a cluttered nightmare. Here are some important ways to store parts and tools in your workshop so that it becomes a place that motivates and inspires your projects:
Pegboards: These flexible panels that you can hang on the wall have been around for a long time. Hang up the tools you use most frequently, such as screwdrivers, (wrenches), and hammers, to keep them handy. You can organize tools of different sizes and forms with pegboard hooks of different sizes.
Racks and Chests for Tools: Buy a strong cabinet or tool chest with drawers to keep your bigger tools and hardware. Make clear labels for each box to save time looking for what you need. You might want to use box liners to keep your tools from moving around and breaking.
Wall Mounted Organizers: Use the space on your walls for extra storage! For bigger things like paint cans or power tools, put up shelves or cases. You can see right away what’s inside clear bins or cases, and pegboard shelves give you more hanging space for small tools.
Screw & Nail Organizers: With compartmentalized screw and nail organizers, you can keep your hardware stash from getting mixed up. You can hang these on the wall, put them on shelves, or even put them in boxes to keep your screws, nails, and other fasteners organized and easy to get to.
Magnetic Holders for Tools: Magnetic tool holders free up space on your desk and keep your metal tools in order. You can put these on the walls or the sides of a toolbox to hold screwdrivers, wrenches, and other magnetic tools.
Mobile Tool Carts: If you want the most freedom, a mobile tool cart might be a good choice. These have a work area, wheels, storage spaces, and shelves for tools and hardware. They are also easy to move around your workshop.
Labeling: Labeling is very important, no matter what storage method you choose. To find drawers, shelves, and bins, use clear stickers or a label maker. This will not only save you time looking, but it will also keep your projects clear and avoid confusion.
10. Toolbox Tales: Inspiring DIY Projects for Beginners:
Are you itching to let your inner handyman (or woman) go but don’t know where to begin? Fear not—even the most seasoned do-it-yourselfers started off as novices. To make the most of your new hardware and tools, consider these creative project ideas:
The Picture Perfect Project: Elevate your wall décor by creating easy-to-assemble image frames! Just a few wood boards, wood glue, a saw (a miter saw works well for cleaner cuts, but a handsaw will do just as well), and some paint or stain are needed for this project. It’s an excellent method to hone your cutting skills and add distinctive frames to your decor.
Add Some Flavor to Your Space: Update worn-out cabinet hardware with a straightforward replacement. Take out your screwdriver and swap out outdated pulls and knobs for sleeker, more contemporary options. This low-cost project can completely change the way your bathroom or kitchen appears and feel.
Let Light Reign!: Take off those dull light shades and let your imagination run wild! You can use wireframes and fabric to design completely new hues, or you can paint the ones that already exist and add ornamental fabric pieces. With this DIY, you can add flair to any area and customize your lighting.
A Slight Green Splash: Construct a chic planter box to display your most cherished indoor plants. You can experiment with various wood types and treatments with this project, which calls for some basic carpentry abilities.
The Well-Ordered Life: Are you feeling overtaken by clutter? Try your hand at making a basic DIY organizer with colorful bins and pegboard. Attach the pegboard to your wall and suspend containers to hold everything from household materials to art supplies. This project gives a stylish touch to your room while keeping it orderly.
Conclusion:
When you have this comprehensive shopping list for hardware and equipment, you may confidently take on DIY tasks. Recall that even the most seasoned handymen had their beginnings. Most importantly, enjoy yourself during the process, and don’t be scared to ask questions at the hardware shop! You’ll quickly become an expert at handling hardware and tools, keeping your toolbox safe, and efficiently organizing your screws and nails with a little practice. Have fun constructing!